
As a racer, you might not think of your website as a critical piece of your program. But to me, your website is to your online brand what your hauler is to your on-track performance: it’s the hub of the action in the pits.
If it’s effective, it holds your tools, spare parts and support crew/materials in a layout that’s designed for racing. The more effective your hauler – the more it contains in a better layout – the better job it enables you to do on the track.
Your hauler doesn’t make or break your on-track performance. But without it, your job would be a heck of a lot harder.
Your website serves the same function when it comes to your ability to grow an audience and support your team financially with sponsorship marketing and merchandise sales, for example.
Yes, you can serve marketing partners without one. And yes, you can sell apparel and build a fan base without one. But it’s less effective – you’ll have to work harder for lesser results.
(Why? When fans want to purchase your apparel but can’t make it to the pits at the track where you’re selling your t-shirts that one night, they go to your website to purchase. When marketing partners do their research on the driver that just pitched them, or they found on a social media channel, they’ll go to your website to see if you’re legit and represent yourself well. When at track announcer needs bio information, when a media member needs results, and when a fan wants to find out more about you, they’ll all go to your website.)
So, let’s work smarter.
I know – from talking to the team owners, drivers, drivers’ wives, crew chiefs and parents who are in charge of marketing their race team – that websites are pretty intimidating.
- Many teams avoid them because there are tons of tutorials on how to build one and sites that promise to walk you through it if you buy their package, but there isn’t a whole lot of information out there on building one for yourself that applies to racers specifically.
- And the alternative is paying a company to build one for you – not always the easiest money to spend when you’re trying to figure out how to pay your speed shop bill. (If you have the budget and want a racing-style website that someone else builds for you, I highly recommend the guys at MyRacePass.com. They’re not paying me to say that, but do tell them I sent you. Hi Chris, Josh and co.!)
I want to take the intimidation factor out of the build it yourself option. For those of you who are willing to take the leap, it’s going to the most economical and fast way to get a quality website that serves your teams’ financial and brand-building needs.
There are three major steps to building your online hub (for less than $100):
- Purchase a hosting package (where your site will live).
- Purchase a domain name (yourname.com).
- Setup your website (sounds so simple when you make it one step!).
There are tons of tutorials out there on this, but I’ll walk you through how I’ve done it for myself and plenty of other brands.
We recently launched the all-new CarlBowser.com and it took me all of 30 minutes to do once I actually sat down and executed it. That includes ‘programming’ all of the content and launching an online merchandise store that’s already generating income for his team. (The bad part? It’s been on my list to do since 2015. #procrastination)
Yours might take a little bit longer if it’s your first time messing around with website, but not much because of the tools we’re going to be using.
If you can use a program like Microsoft Word, you’re capable of building a simple and effective website that fans and marketing partners will love in very little time. So let’s get on it.
Step #1: Purchase your hosting package.
There are so many hosting companies out there, and, to be honest, they pretty much all do the same thing most of the time. Personally, I’ve tried Bluehost, Hostmonster, and GoDaddy over the years. In my experience, Bluehost has been the most user-friendly, secure, simple and cost-effective platform with the least downtime.
You can pick whichever host you’d like, but my quick tutorial will show you what it’s like to use Bluehost because that’s now what all of my sites are using. (And, just so you know, if you purchase through my link I will receive a commission. That’s a little bit of coffee money for me in exchange for providing free content. You won’t be charged anymore because of that, but I certainly will appreciate it!)
Generally, Bluehost costs $7.99/month for new customers. At this moment, they’re running a special for $3.49/month for new customers. So that’s $42-94/year for web hosting depending on if they’re running a sale or not. Or about 1/2 of a tire. Not bad.
So, what do you do? Head over to Bluehost and click the Sign Up button. You’ll be asked to select a plan:
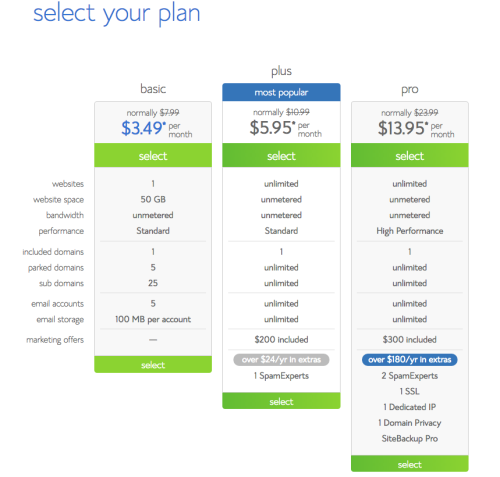
Choose the basic package. I know all the extra goodies look fun (or scary, like you need them), but you really don’t need anything more than basic at this point. Once you select the basic package, you’ll…
Step #2: Purchase your domain name
But guess what? Your first domain name is FREE when you use Bluehost (and some other hosting companies, FYI). No matter what host you use, you will have to purchase the rights to keep that domain name each year. It varies quite a bit, but generally runs $12-15/year.
So, once you hit ‘Select’ on the package, you’ll see this screen: 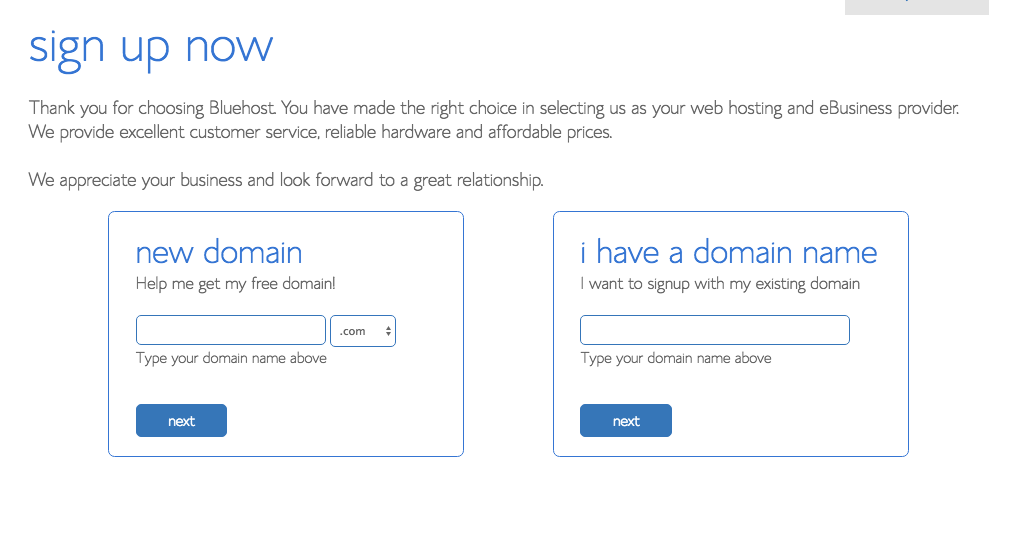
If you don’t already own your domain name, now’s the time.
By the way, I often get the question of what to pick for your website URL. Go with the driver’s name? Add racing on the end? Setup one for the team? My answer is that it depends on who you are. If you’re the team owner setting it up for your team and the driver is hired or replaceable, go with yourteamname.com. If you’re the driver or team owner and you need a website for yourself outside of racing, pick yournameracing.com or yournamemotorsports.com. Otherwise, go with yourname.com if it’s available.
Remember: shorter and simpler is easier to – ahem – remember.
(If you already have a domain name, you’ll have to move it to your new hosting package later. Bluehost has a quick and easy tutorial for how to do so in their help section.)
Then, you’ll create your account:

And choose your package details (below). I don’t recommend any of the extras. They’re unnecessary for our purposes.
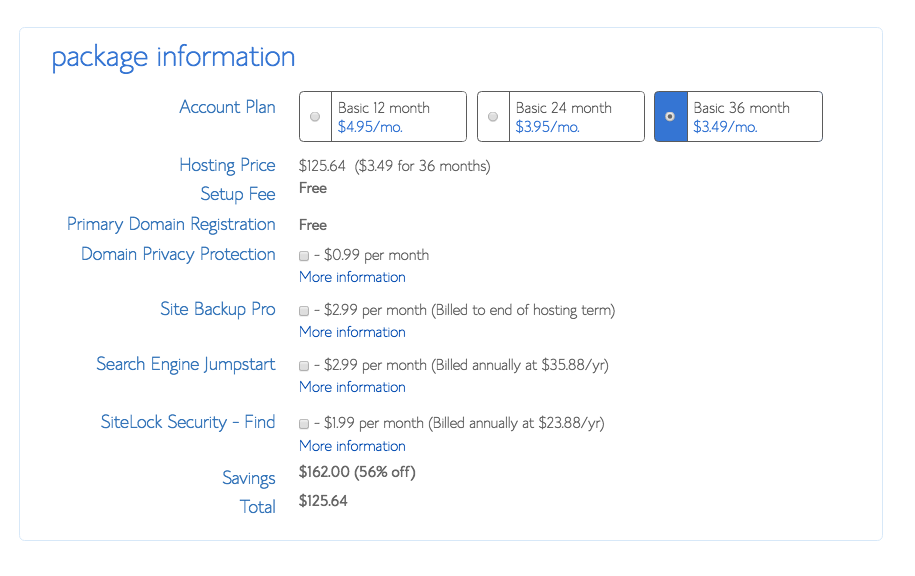
You can also select a shorter package if you’d like. Then, you’ll enter your credit card information and get directed to an order confirmation page.
BOOM! That’s it for Steps #1 and #2.
Stop back later for Step #3.
About the author
Kristin Swartzlander is passionate about applying business sense to racing 'nonsense' in hopes of growing the sport of dirt track racing. She is a business strategist who works with entrepreneurs and small businesses to help them learn how to use public relations, marketing and social media to achieve their goals. Learn more about social media, marketing and racing sponsorship on the DirtyMouth blog.
- More at
